
| 일 | 월 | 화 | 수 | 목 | 금 | 토 |
|---|---|---|---|---|---|---|
| 1 | ||||||
| 2 | 3 | 4 | 5 | 6 | 7 | 8 |
| 9 | 10 | 11 | 12 | 13 | 14 | 15 |
| 16 | 17 | 18 | 19 | 20 | 21 | 22 |
| 23 | 24 | 25 | 26 | 27 | 28 | 29 |
| 30 |
- AWS S3 migration
- gitlab 잔디옮기기
- ERR unknown command 'JSON.SET'
- Avast 구독취소
- 패스트캠퍼스
- aws s3
- 잔디이전
- 직장인인강
- ERR unknown command 'JSON.GET'
- putty Inactive
- 환급챌린지
- 패캠챌린지
- Window redis-cli
- Redis
- 캐시백
- aws
- nodemailer
- redis cli
- elastic cache
- 캐시백챌린지
- redis-cli
- Ngrinder Docker
- 한 번에 끝내는 AWS 인프라 구축과 DevOps 운영 초격차 패키지 Online
- AWS S3 버킷 삭제
- AWS S3 계정이동
- vscode
- 직장인자기계발
- Avast Security
- RedisJSON
- 패스트캠퍼스후기
- Today
- Total
Developing
VScode 환경에서 C/C++ 개발환경 구축하기 본문
관련건에 대해서 가장 잘 설명을 잘해주신 영상의 링크는 다음과 같다.
본 게시물은 해당 영상의 방법으로 진행한다.
www.youtube.com/watch?v=3-PD_AUSOLM&ab_channel=%EB%9D%BC%EC%A6%88%EC%9D%B4%EB%85%B8IOT
1. VSCode를 설치한다.
2.VSCode의 왼쪽 메뉴바에서 맨밑의 Extensions 메뉴를 선택한 후, c를 검색한다.
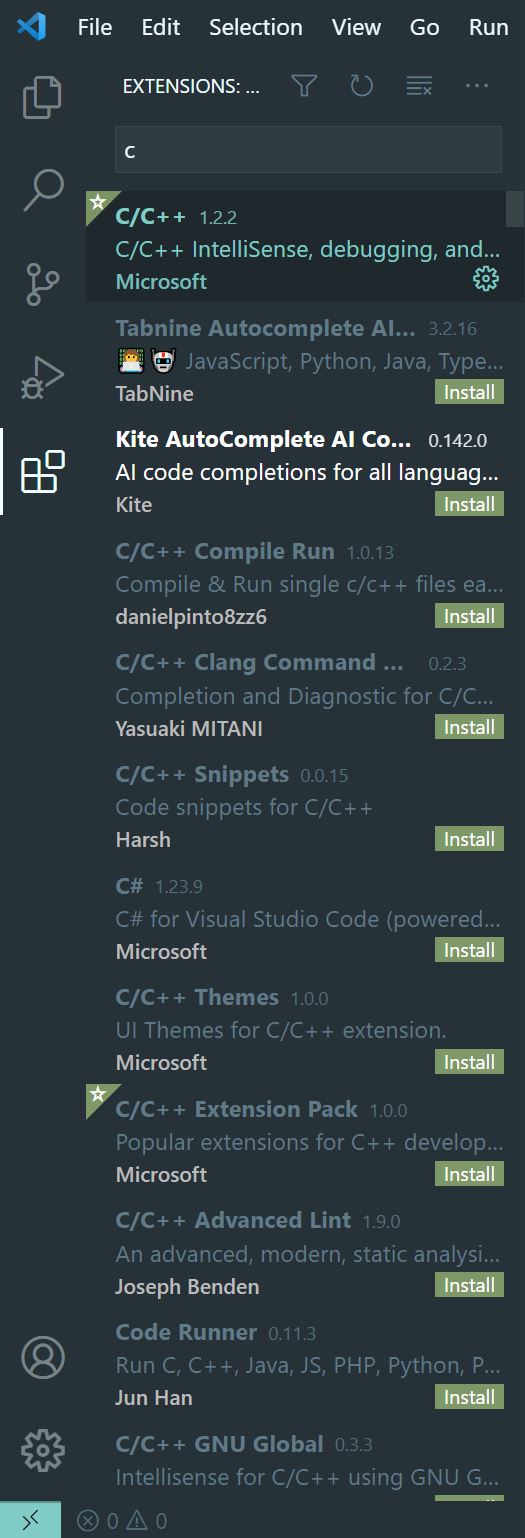
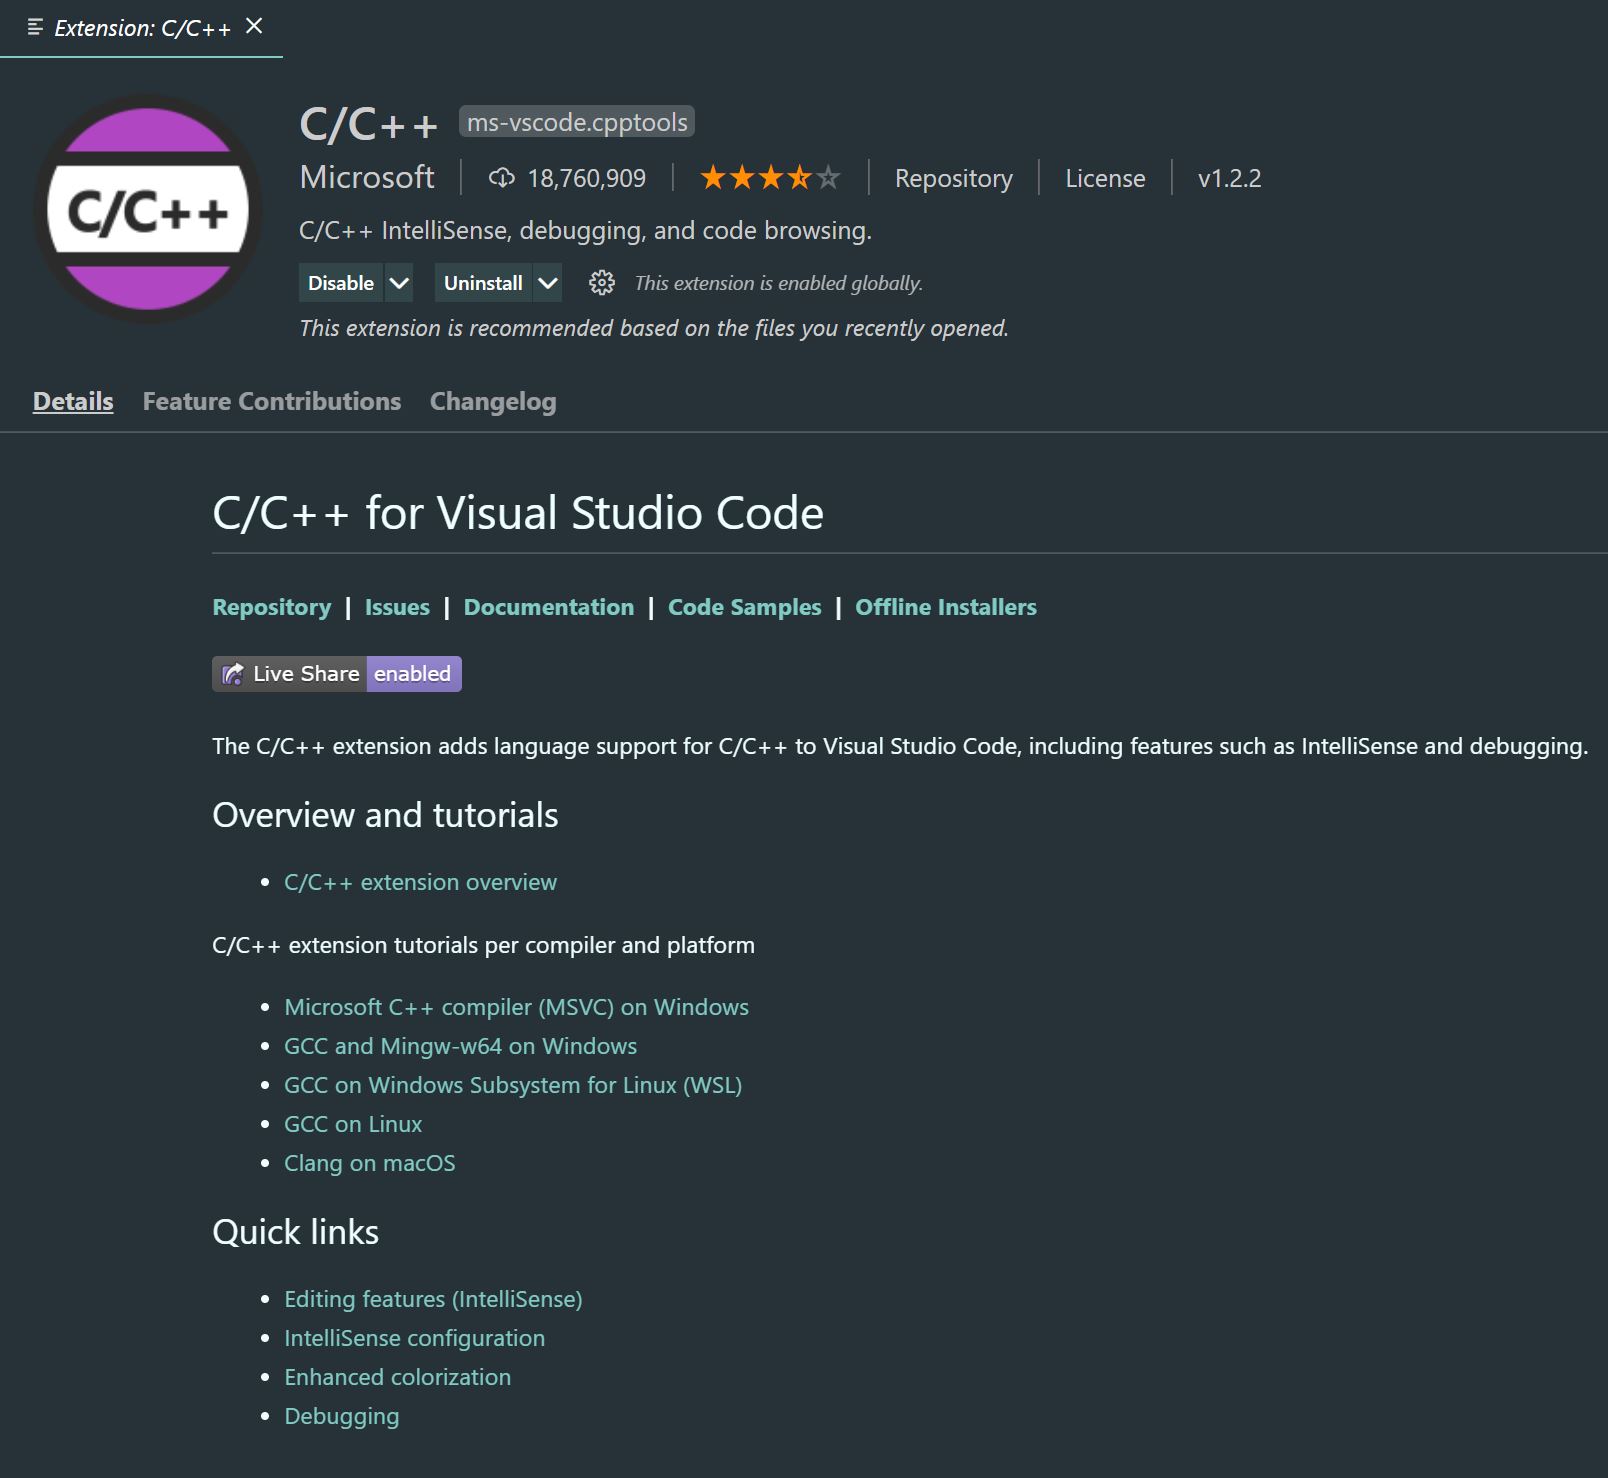
3.Extension을 Install 해준다.
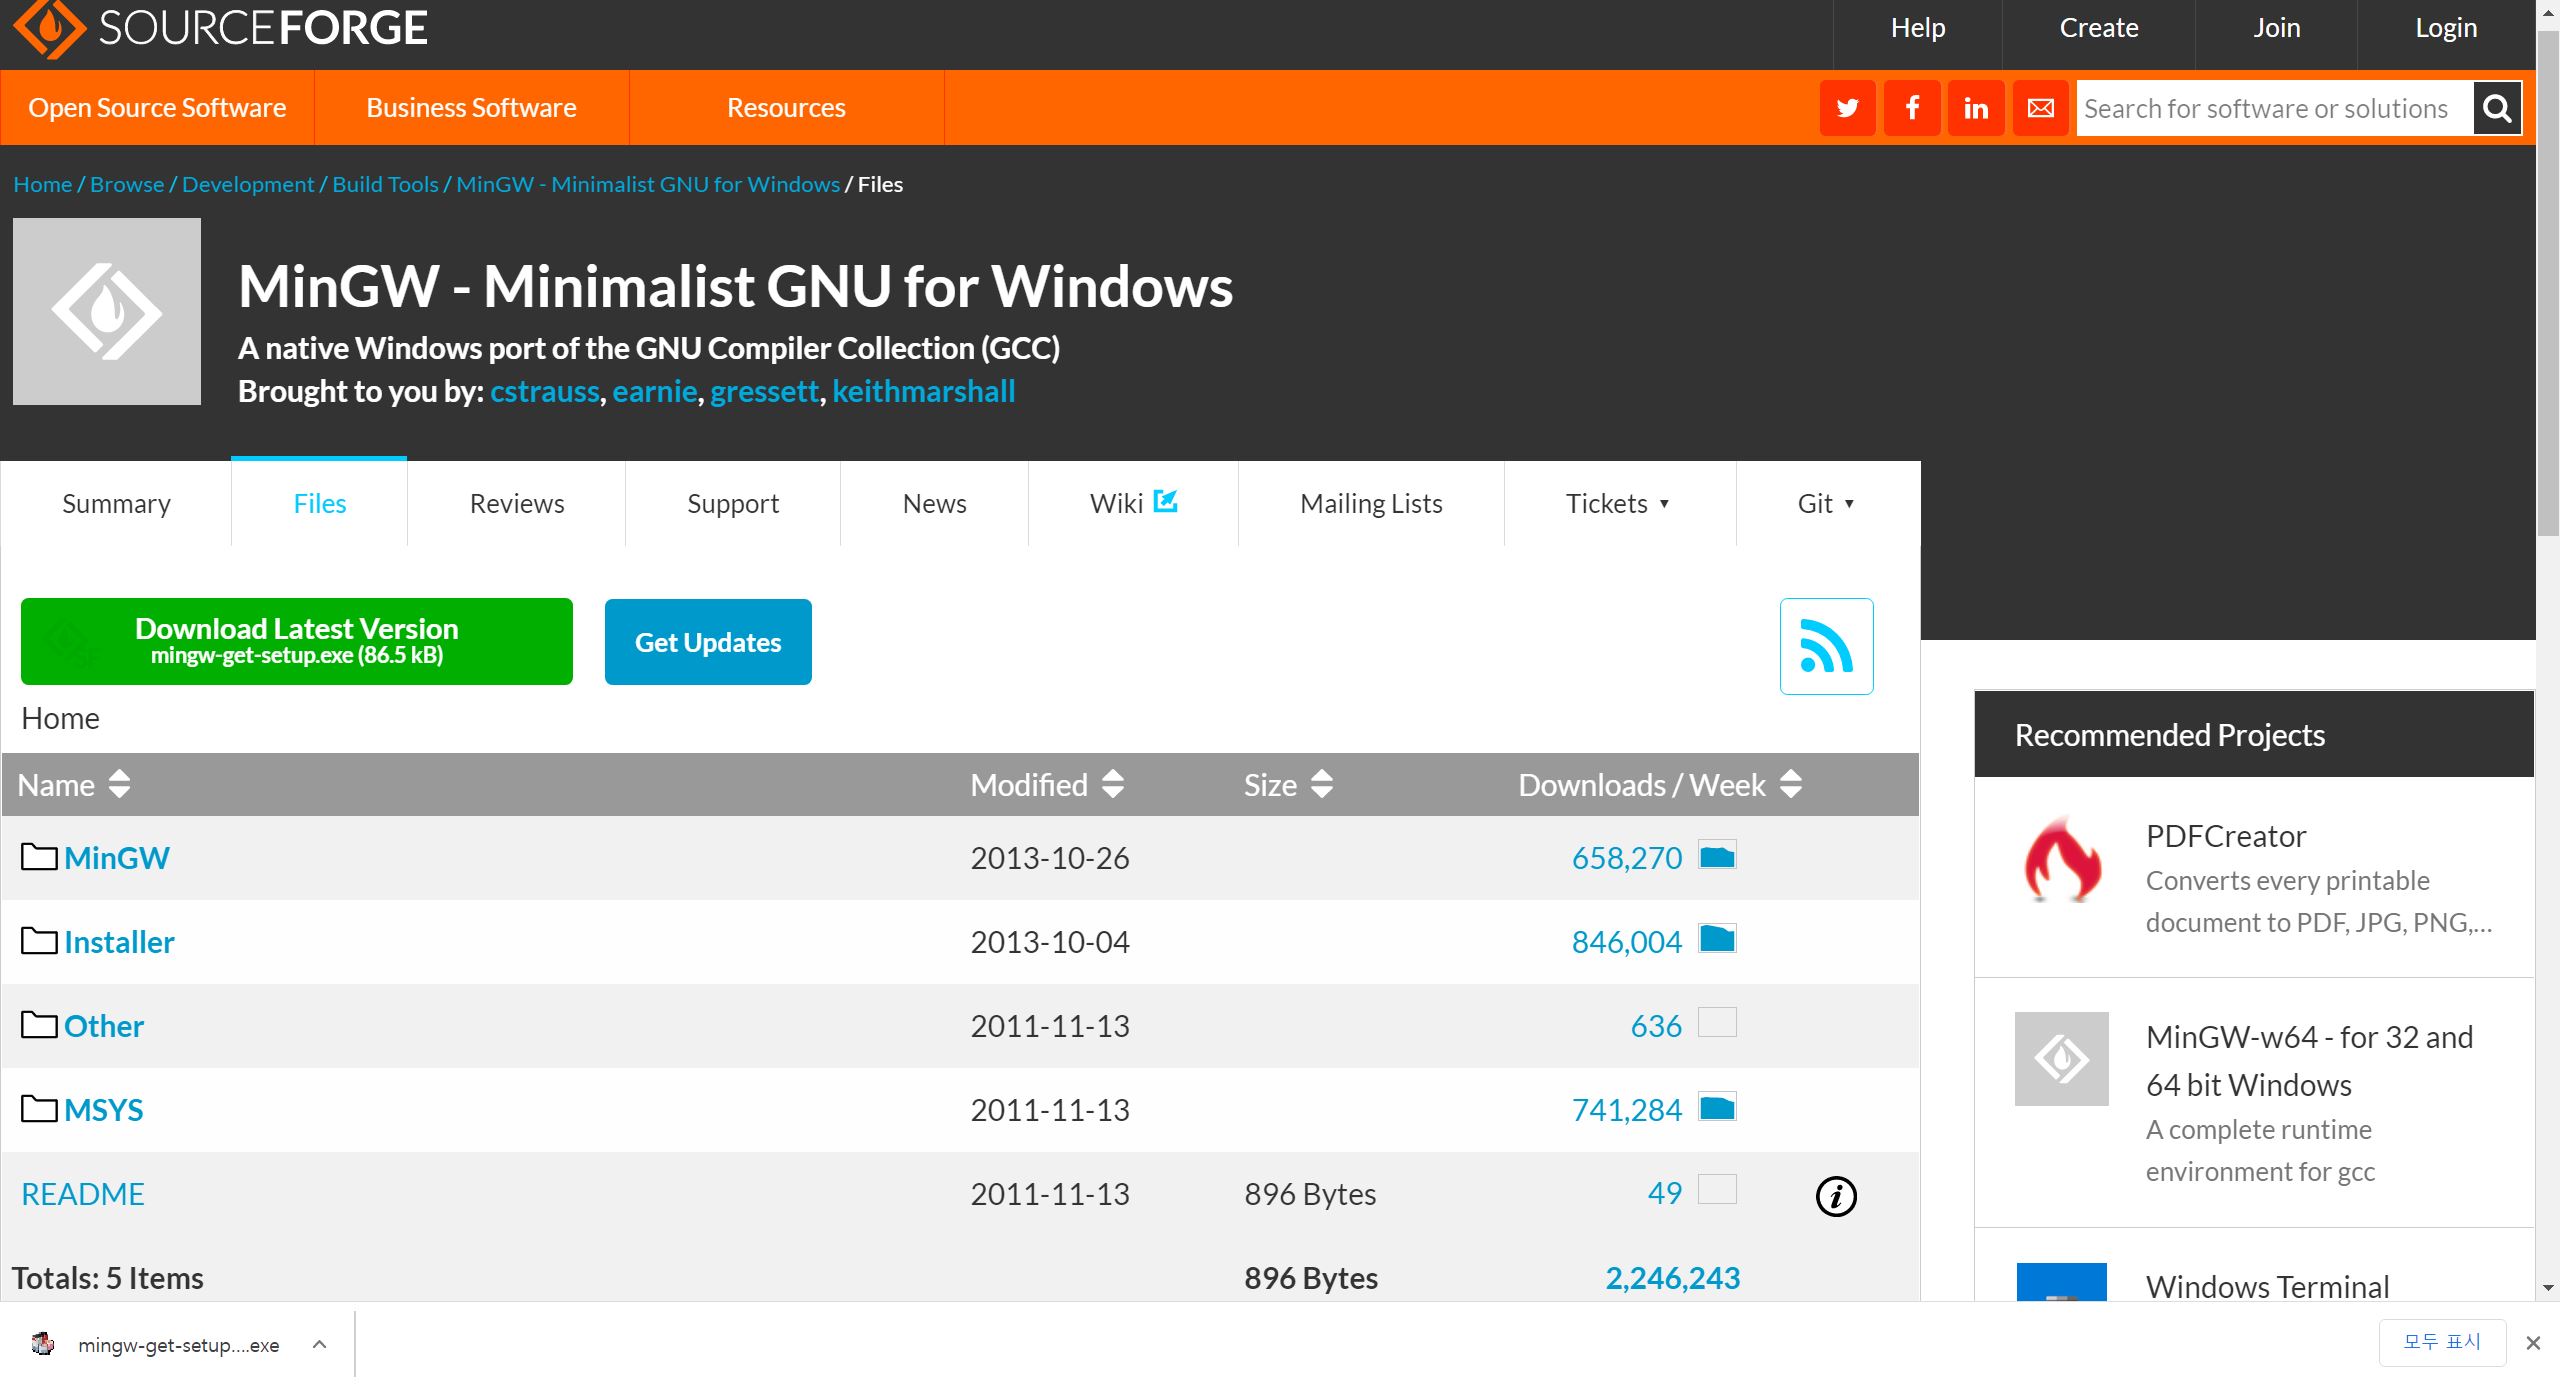
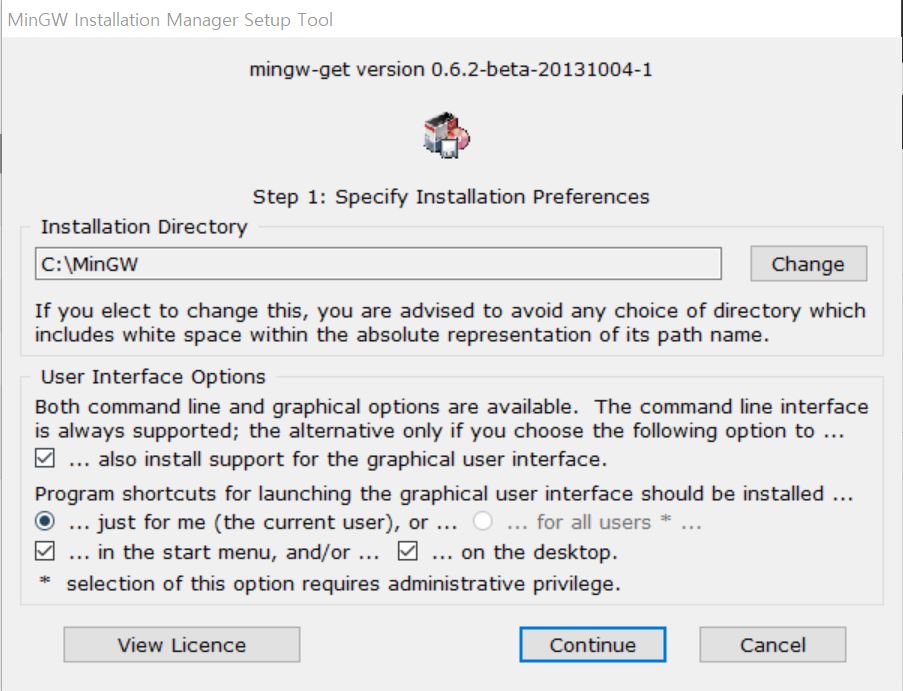
4.아래 사이트에 접속해 MinGW를 Download 후 Install해준다.
sourceforge.net/projects/mingw/files/
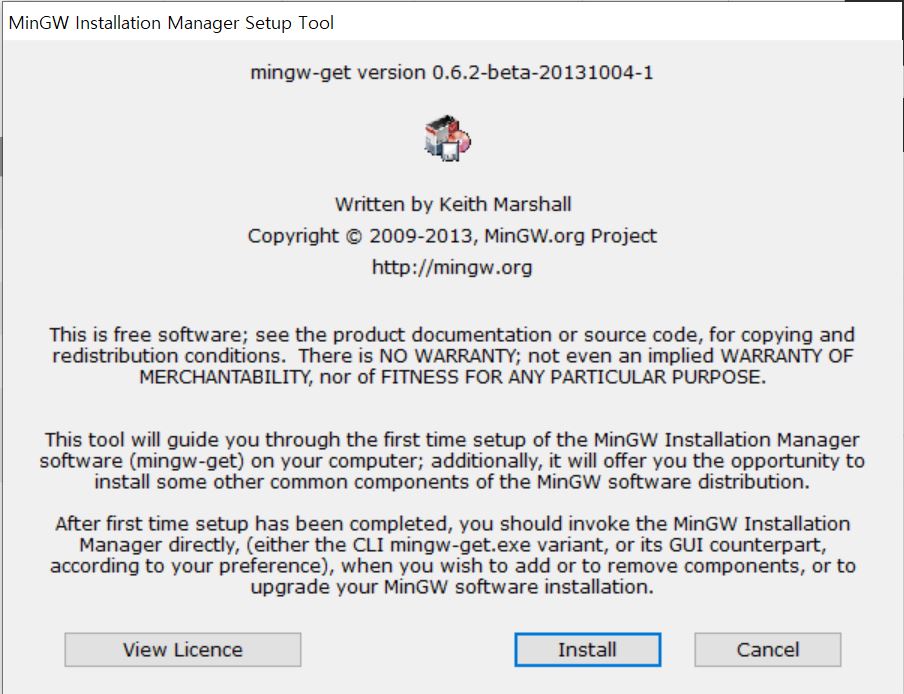

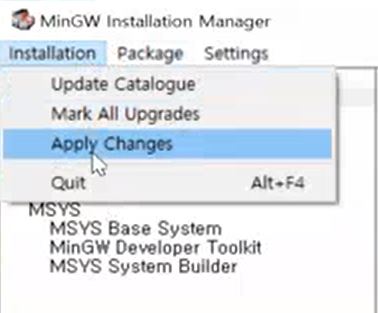
4가지 항목에 대해서 오른쪽마우스 클릭->Mark for Installaion -> 위의 메뉴바에서 Installation -> APPLY Chagnes
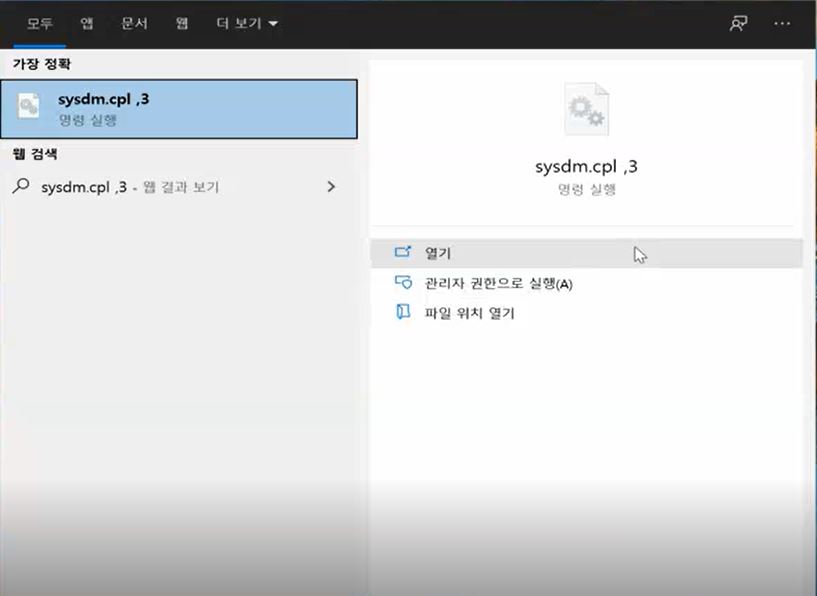
5.환경변수 설정

윈도우 창에 sysdm.cpl ,3 을 입력한다. ('시스템 환경 변수 편집' 이라고 검색하여도 무방함)

환경변수 탭을 누른다.
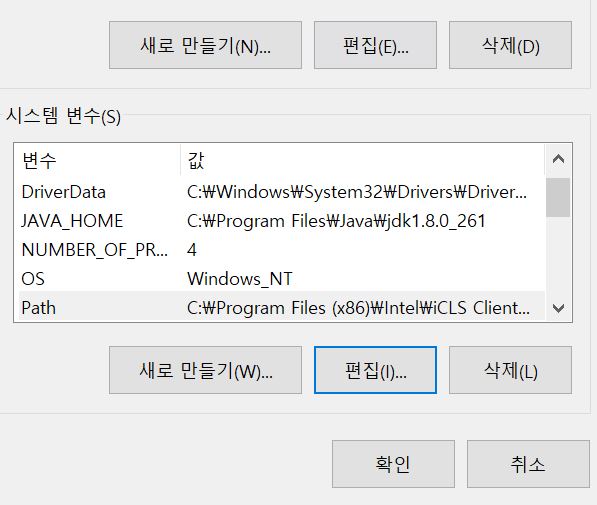
PATH변수를 찾아 더블클릭하거나, 편집을 누른다.

새로 만들기 탭을 누르고 C:\MinGW\bin 를 입력해준다.
경우에 따라 환경변수가 바로 반영이 안될 수도있기에, 재부팅을 해야할 수도있다.
(필자의 경우가 이러하였음)
cmd창에서 각각 gcc -v , g++ -v 을 입력해 적용이 잘 되었는지를 확인할 수 있다.


6. VSCODE창을 재실행하고 C 프로젝트 환경을 구축할 WorkSpace를 만든다.
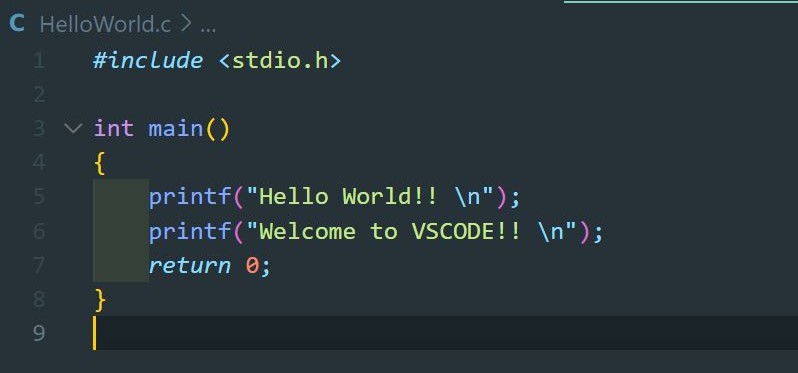
7.HelloWorld.c 와같은 프로그램을 작성해준다.
8.vscode의 메뉴바에서 Terminal > Configure Default Build Task


10. save and compile for c 를 누른다.
11. tasks.json의 내용을 전부 지우고 다음과 같은 내용을 입력한다.
{
    "version": "2.0.0",
    "runner": "terminal",
    "type": "shell",
    "echoCommand": true,
    "presentation": {
        "reveal": "always"
    },
    "tasks": [
        //C++ 컴파일
        {
            "label": "save and compile for C++",
            "command": "g++",
            "args": [
                "${file}",
                "-o",
                "${fileDirname}/${fileBasenameNoExtension}"
            ],
            "group": "build",
            //컴파일시 에러를 편집기에 반영
            //참고:   https://code.visualstudio.com/docs/editor/tasks#_defining-a-problem-matcher
            "problemMatcher": {
                "fileLocation": [
                    "relative",
                    "${workspaceRoot}"
                ],
                "pattern": {
                    // The regular expression.
                    //Example to match: helloWorld.c:5:3: warning: implicit declaration of function 'prinft'
                    "regexp": "^(.*):(\\d+):(\\d+):\\s+(warning error):\\s+(.*)$",
                    "file": 1,
                    "line": 2,
                    "column": 3,
                    "severity": 4,
                    "message": 5
                }
            }
        },
        //C 컴파일
        {
            "label": "save and compile for C",
            "command": "gcc",
            "args": [
                "${file}",
                "-o",
                "${fileDirname}/${fileBasenameNoExtension}"
            ],
            "group": "build",
            //컴파일시 에러를 편집기에 반영
            //참고:   https://code.visualstudio.com/docs/editor/tasks#_defining-a-problem-matcher
            "problemMatcher": {
                "fileLocation": [
                    "relative",
                    "${workspaceRoot}"
                ],
                "pattern": {
                    // The regular expression.
                    //Example to match: helloWorld.c:5:3: warning: implicit declaration of function 'prinft'
                    "regexp": "^(.*):(\\d+):(\\d+):\\s+(warning error):\\s+(.*)$",
                    "file": 1,
                    "line": 2,
                    "column": 3,
                    "severity": 4,
                    "message": 5
                }
            }
        },
        // // 바이너리 실행(Windows)
        {
            "label": "execute",
            "command": "cmd",
            "group": "test",
            "args": [
                "/C",
                "${fileDirname}\\${fileBasenameNoExtension}"
            ]
        }
    ]
}
12. File > Preferences > Keyboard ShortCuts 를 선택한다.

13. keybindings.json에 다음과 같은 내용들을 입력해준다.
// Place your key bindings in this file to override the defaults
// 아래 키 바인딩을 파일에 넣어서 기본값을 덮어 씁니다.


[
    // 컴파일
    {
        "key": "ctrl+alt+c",
        "command": "workbench.action.tasks.build"
    },
    // 실행
    {
        "key": "ctrl+alt+r",
        "command": "workbench.action.tasks.test"
    }
]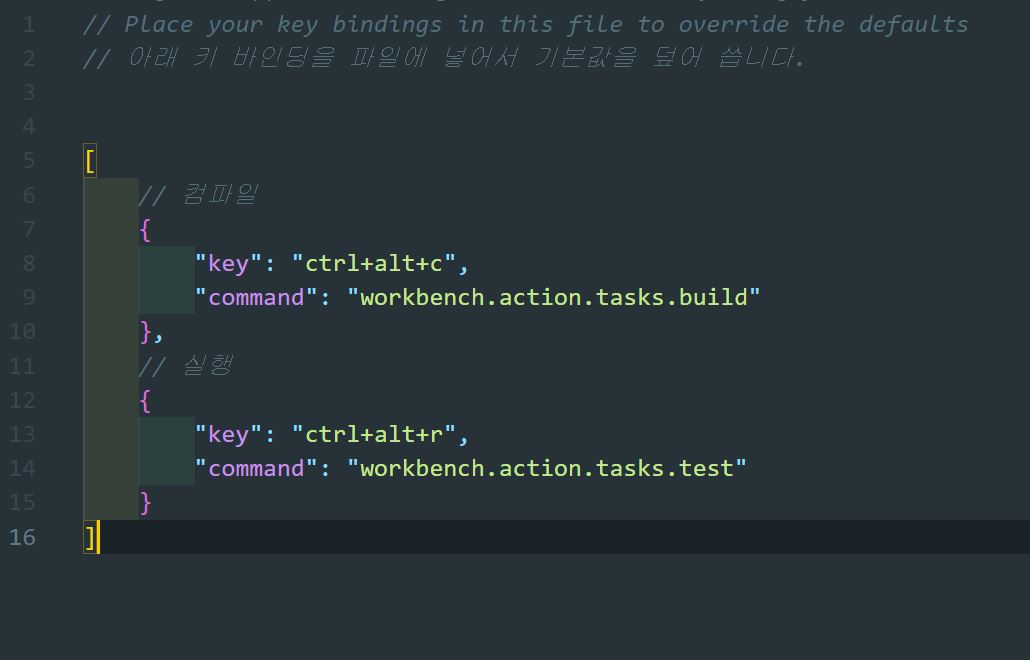
이렇게 되면 Ctrl+alt+C 로 컴파일, Ctrl+alt+R 로 실행을 할 수 있게된다.


'Tips(Reference) > etc' 카테고리의 다른 글
| Ngrinder Stress Testing Tool Setting(download + Docker 활용 방식) (0) | 2023.06.27 |
|---|---|
| Avast Security 구독취소하기(계정 모를때 해결방법) (2) | 2023.06.11 |
| Udemy 강의를 무료로 수강하는 방법(with Kmooc) (0) | 2022.12.06 |
| PORT 종료하는방법 (netstat,taskkill) (0) | 2022.08.18 |
| Tistory 코드블럭 색상적용법 (0) | 2022.05.20 |


